Okay folks, what is my number one reason for using Evernote? Blogging on the go (and yes that image was shamelessly taken from Evernote’s website).
Well, that seems counter intuitive since I am writing this in WordPress and I am singing the praises of Evernote for blogging (by way of Postach.io). The plain and simple truth is that WordPress takes a high degree of technical knowledge and time to setup and maintain, and its Mobile App sucks the marrow from life. My current blog workflow is to use Scrivener with Evernote and Coda2 to create content and hand-code styles for every post. It seems tedious, and it is, but it does everything that I want all the time (I have another post on the workflow coming with more details). So why should you go through all of the trouble to create an Evernote blog through Postach.io? Because it will make your life easy and what makes your life easy makes you smile more.
What is Postach.io?
Postach.io is a third party client that uses Evernote to create a blog based upon a Users Notebook and Tags. Your first blog is free, and I highly suggest you sign up for your first one, if you are an Evernote user. Here is my dream workflow and lets see if you can sympathize. I would love to be able to create a Document from a set of internet articles and online research that will allow me to synthesize that information into a Presentation and a Blog post without needing to reformat or use other applications. Well, if you are like me, here is Evernote to the rescue.
How it works?
Postach.io works by connecting to a single notebook in your Evernote Account. Don’t worry, in the setup phase you can select which notebook to use for that process. For me, my Evernote Blog is in the PublicBlog notebook. So why is this so much better than WordPress? It all comes down to the Evernote Sync and Presentation Modes. While I am at work, I use Evernote Premium to create presentations (you can see some on my Evernote Page). At the end of the day, I can simply transfer my presentation to my blog and quickly add the “published” tag to upload it to the blog. All in all, one of the simplest blogging platforms I have ever seen.
Blogging for Travel
So this is where the real meat of this post will be. On the top of this page, under the blog tab, you will see a Photo Notes page. If you open that up, you will be directed to my Evernote Public Blog. Right now, it is all about traveling and exploring this wonderful area around us. That is how I use my Evernote blog, as a way to share trip photos and experiences while I travel. Here is how I do it…
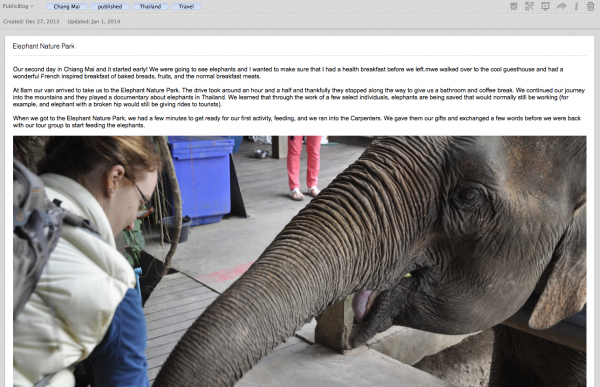
I always travel with my iPad Mini, Nikon D60, and my iPad SD Adapter. As an Evernote Premium member, I make sure that I have a bunch of space available on my iPad when I leave (and store my travel documents which you can see how I do that in this post). Now, at the end of my day, I get into the hotel and I do a quick transfer of Photos from my Nikon to my iPad. This only takes a couple of minutes and has the benefit of adding all of the Photos from my D60 into my PhotoStream which is then backed-up on my Mac at home. As an added benefit, this takes some of the worry out of losing my camera (or damaging it). Once I have the photos on the iPad, I start doing some writing and weave the story of my adventures from the day in my Evernote Application. Within Evernote, I will make sure that I add the note to the correct notebook (in my case that is the PublicBlog) and I make sure that I embed all of the pictures that I want in my blog post. After doing some editing, I add the “published” tag to my note via the Evernote app and viola my blog will update as soon as I am on wifi. This is what my note looks like in Evernote for Mac:

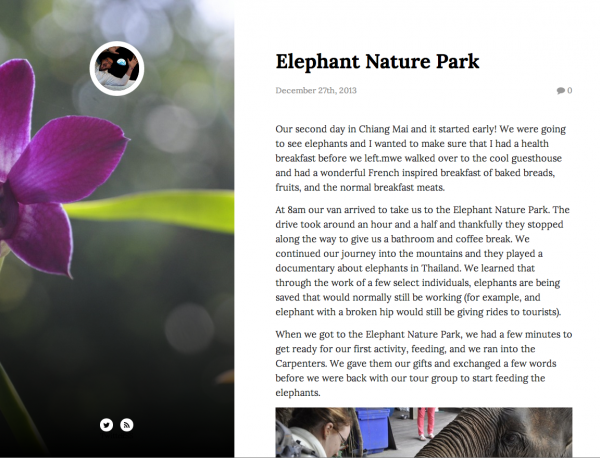
Once I added the published tag, it added it directly to my blog (which you can see in the screenshot below or by clicking here):


